You can build a complete, learn-on-it crochet kit for under $50, and ComfyCrochet's advice is simple: spend your money on two decent hooks and smooth light-coloured yarn, then skip almost everything else the big kits try to sell you. The two things that make learning frustrating are a hook that catches your yarn and yarn so dark or fuzzy you can't see your own stitches. Fix those two, and the rest is cheap.
A crochet hook is the tool you hold; a stitch is one loop pulled through another. When both are working with you, learning feels slow but steady instead of like a fight. Let's build the kit that gets you there.
Here's a quick fact worth knowing before you shop: a standard worsted-weight acrylic skein (often labelled "medium" or "4" on the yarn band) holds roughly 350 to 380 yards for around $4, which is enough for weeks of practice swatches. You do not need more than two to start.
| Product | Best for | Why it wins | Trade-off |
|---|---|---|---|
| Susan Bates 5mm aluminium hook | Learning the basics | Slick shaft lets yarn glide; the inline head catches loops cleanly | Thin handle tires some hands over long sessions |
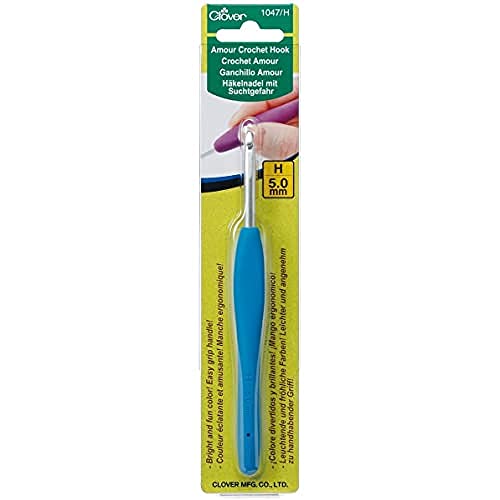
| Clover Amour 6mm ergonomic hook | Hand comfort from day one | Soft rubber grip and tapered head reduce hand strain | Costs $8-10 for one hook, more than a whole aluminium set |
| Red Heart Super Saver worsted | Cheap, durable practice yarn | Huge yardage, holds up to being frogged again and again | Slightly stiff and squeaky compared to softer brands |
| Lion Brand Basic Stitch worsted | Softer feel while learning | Smooth ply, clear stitch definition, gentle on hands | A dollar or two more per skein than the cheapest options |
What's the shortest answer for a first crochet kit?
Buy one 5mm aluminium hook, one 6mm ergonomic hook, two skeins of smooth worsted acrylic in a pale colour, a blunt yarn needle, and small scissors. That's the whole list. It costs around $30 to $45 depending on which hooks you pick, and it covers every beginner project.
The reason this short list works is that beginners repeat the same three motions for weeks: chain, single crochet, double crochet. You do not need twelve hook sizes to learn those. A 5mm hook (sometimes marked H-8) pairs perfectly with worsted yarn, which is the most common yarn thickness in beginner patterns and tutorials.
Add a 6mm (J-10) as your second size because slightly looser stitches are easier to see and un-do when you make a mistake. Un-doing stitches is called "frogging," and you will do it a lot, which is completely normal. A pale, smooth yarn on a 6mm hook makes frogging painless instead of a knotted mess.
Where is buying cheap crochet supplies totally fine?
Cheap is fine for practice yarn, your yarn needle, scissors, and a basic aluminium hook. These are the parts of budget crochet supplies where a higher price buys you almost nothing while you're learning. A $4 skein of acrylic behaves the same as a $12 skein for making your first hundred single crochets.
Yarn needles, also called tapestry needles, are blunt needles you use to weave in loose ends. A pack of them costs a couple of dollars and the expensive ones do the exact same job. The same goes for small scissors; any sharp pair from a sewing kit works. Don't spend on fancy versions yet.
Value yarn brands like Red Heart Super Saver and Lion Brand exist for exactly this stage. They come in big skeins, survive being frogged repeatedly, and cost little enough that you won't feel guilty practising on them. Pick a light solid colour like cream or pale grey, never black or a dark variegated mix, because you have to see individual stitches to count them. Reading the band matters here too, and our guide on reading a yarn label shows you what those symbols mean.
Where does cheap crochet gear actually backfire?
Cheap backfires hardest on your main hook and on rough, splitty yarn. A poorly finished hook has a rough head that snags the yarn on every stitch, and a fuzzy or loosely spun yarn splits so the hook slips between plies instead of catching the whole loop. Both make you feel clumsy when the real problem is the tool.
This is the one place ComfyCrochet says spend a little more. A Susan Bates aluminium hook has a slick shaft and an "inline" head, meaning the hook's point lines up with the shaft so loops slide off smoothly. Boye-style hooks have a more rounded "tapered" head that some beginners find grabs unevenly. Neither is wrong, but a smooth, well-made hook removes a frustration you'd otherwise blame on yourself.
If your hands ache after twenty minutes, that's a signal, not weakness. A thin metal handle transfers strain straight to your thumb and finger joints. A cushioned grip spreads the pressure out. The specifics of what makes a handle comfortable are covered in the hook specs that cut pain. If your budget only stretches to one nice thing, make it the hook you hold most.
What are the best value hooks and yarn to start with?
The best-value combination is a Susan Bates aluminium 5mm hook paired with a Clover Amour 6mm ergonomic hook, plus two skeins of Lion Brand Basic Stitch or Red Heart Super Saver worsted. This mix gives you a smooth budget hook, one comfortable hook, and forgiving yarn, all for a starter setup under 50 dollars.
Compare the three common approaches. A 100-piece hook set for $20 looks like a bargain but hides forty tiny accessories you'll never touch and hooks in sizes beginner patterns rarely call for. A single premium hook like the Clover Amour costs $8 to $10 but you only own one size. A small hand-picked pair, one cheap and one ergonomic, costs about the same as the giant bin and gives you exactly the two sizes worsted patterns need.
On yarn, Red Heart Super Saver wins on pure toughness and yardage for the lowest price, while Lion Brand Basic Stitch feels softer and shows stitches more clearly for a dollar or two more. Both are certified to OEKO-TEX Standard 100, meaning they've been tested for harmful substances, which matters if you later crochet for children. For learning, either works; pick by whether you'd rather save money or save your fingertips a little scratchiness.
What should a beginner skip entirely at first?
Skip the giant hook bins, stitch-marker mega-packs, blocking mats, yarn winders, project bags, and any "deluxe" kit over $30. None of these help you form a single stitch. Knowing what to skip is how a small budget stretches to cover the few things that actually matter for learning.
Stitch markers are the classic over-buy. You'll want two or three eventually to mark where a round begins, but a bent paper clip or a scrap of contrasting yarn does the same job for free while you learn. Buy the little clip markers later, once you start amigurumi (crocheted stuffed toys worked in continuous rounds) where marking really helps.
Yarn winders and swifts are tools for turning loose hanks into tidy balls, and beginner acrylic comes in ready-to-use skeins that need neither. If you're curious whether you'll ever want them, our breakdown of a yarn winder versus a swift explains when they're worth it, which is not now. Spend that money on a second colour of yarn instead so practice stays interesting.
How do I put the full setup together step by step?
Build the kit in order of what you'll touch first. Start with hooks and yarn, add the two finishing tools, and stop there. The whole shop takes ten minutes online and lands well under $50, leaving room for a second skein when you're ready to make something real.
Don't buy a printed pattern book yet either. Free tutorials cover every beginner stitch, and a book you can't yet read just gathers dust. Once you can chain and single crochet without looking, a $12 stitch dictionary becomes genuinely useful. Order matters here: skill first, then the tools that serve that skill.
If you're left-handed, the hooks and yarn are identical but the tutorials need mirroring, so start with our left-handed beginner's first kit before you press buy. Everyone else can follow the numbered list below and be stitching by the weekend.